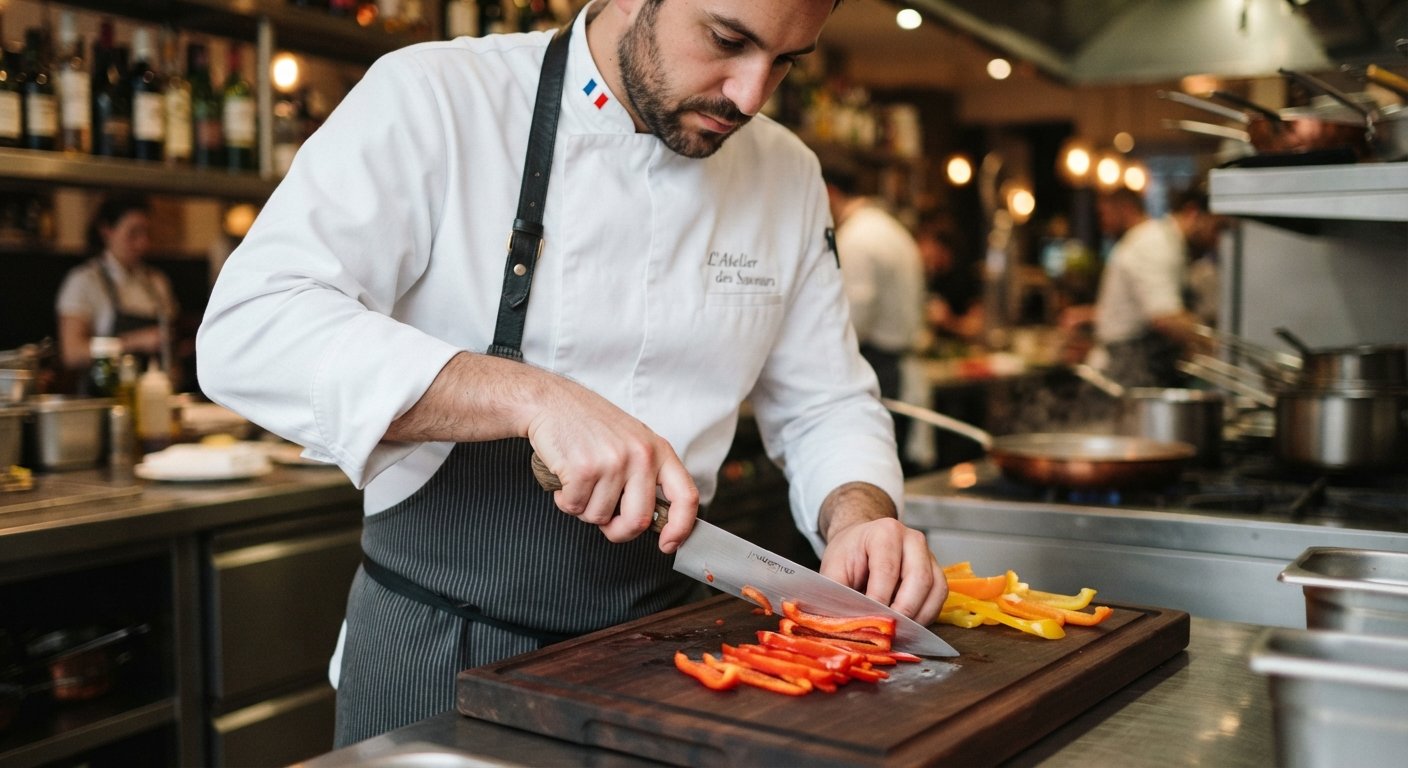
Knife & Prep Techniques
Julienne
Cutting food into long, thin matchstick-like strips, about 1/8 inch thick and 2 inches long.
- Square off the vegetable into a rectangular block.
- Slice lengthwise into thin, even planks.
- Stack the planks and slice lengthwise again into matchsticks.
- Guide the knife against your curled knuckles for even width.
Brunoise
A fine dice, about 1/8 inch cubes, made by julienning first and then cutting crosswise.
- Julienne the vegetable into thin matchsticks.
- Gather the matchsticks into a tight bundle.
- Cut crosswise at 1/8-inch intervals.
- Use light, quick cuts so you don't crush the pieces.
TOOLS NEEDED
Shop Kitchen Knives on Amazon →
Shop Cutting Boards on Amazon →
Chiffonade
Thinly sliced ribbons of leafy herbs or greens, often used for basil or mint as a garnish.
- Stack several leaves, largest on the bottom.
- Roll the stack tightly into a cigar shape.
- Slice crosswise into thin ribbons.
- Fluff the ribbons apart with your fingers before using.
TOOLS NEEDED
Shop Kitchen Knives on Amazon →
Shop Cutting Boards on Amazon →
Mincing
Chopping food into very small, irregular pieces, finer than a dice — most common with garlic and ginger.
- Roughly chop the ingredient first.
- Rock the knife back and forth, pivoting the tip with your guide hand.
- Gather the pieces back into a pile periodically.
- Continue until fine and uniform.
TOOLS NEEDED
Shop Kitchen Knives on Amazon →
Shop Cutting Boards on Amazon →
Dicing
Cutting food into consistent cube shapes — small (1/4"), medium (1/2"), or large (3/4").
- Trim the vegetable to square off rounded edges.
- Slice into planks of the desired thickness.
- Cut the planks into strips of the same thickness.
- Turn 90 degrees and cut crosswise into even cubes.
TOOLS NEEDED
Shop Kitchen Knives on Amazon →
Shop Cutting Boards on Amazon →
Zesting
Removing just the flavorful outer layer of citrus peel, without the bitter white pith beneath.
- Wash and dry the citrus fruit.
- Run a microplane or zester lightly over the surface, rotating as you go.
- Stop before you hit the white pith.
- Use immediately — zest dries out fast.
TOOLS NEEDED
Shop Microplanes and Citrus Zesters on Amazon →
Supreme (Citrus)
Removing citrus segments cleanly from their membranes, with no pith or skin attached.
- Slice off the top and bottom of the fruit.
- Slice off the peel and pith in strips, following the curve.
- Over a bowl, slice along each side of the membranes to release segments.
- Squeeze the remaining core over the bowl for the juice.
TOOLS NEEDED
Shop Paring Knives on Amazon →
Shop Bowls on Amazon →
Deveining Shrimp
Removing the dark digestive tract running along the back of a shrimp.
- Peel the shrimp if not already done.
- Make a shallow cut along the back of the shrimp.
- Lift out the dark vein with the knife tip or your fingers.
- Rinse briefly under cold water.
TOOLS NEEDED
Shop Paring Knives on Amazon →
Trussing
Tying poultry with kitchen twine so it holds a compact, even shape while roasting.
- Tuck the wing tips under the body of the bird.
- Cross the legs and tie tightly with kitchen twine.
- Loop twine around the body to hold the wings close, if needed.
- Trim excess string.
TOOLS NEEDED
Shop Kitchen Twine on Amazon →
Shop Kitchen Shears on Amazon →
Butterflying
Cutting meat almost in half horizontally and opening it flat like a book, for even thickness.
- Hold the meat flat with one hand.
- Slice horizontally through the middle, stopping short of the far edge.
- Open the meat like a book along the uncut hinge.
- Pound gently for an even, thinner thickness if needed.
TOOLS NEEDED
Shop Kitchen Knives on Amazon →
Shop Cutting Boards on Amazon →
Shop Meat Mallet on Amazon →
Dry Heat Cooking Methods
Sautéing
Cooking food quickly in a small amount of fat over relatively high heat, keeping it moving.
- Heat a thin layer of oil or butter until shimmering or foaming.
- Add food in a single layer without crowding the pan.
- Toss or stir frequently for even cooking.
- Remove as soon as done — food continues cooking off the heat.
TOOLS NEEDED
Shop Saute Pan on Amazon →
Shop Spatulas on Amazon →
Shop Tongs on Amazon →
Searing
Browning the surface of meat or fish quickly over very high heat, before finishing another way.
- Pat the food completely dry.
- Heat a heavy pan with a little oil until almost smoking.
- Leave the food undisturbed until a deep crust forms.
- Flip once, repeat, then finish cooking through as needed.
TOOLS NEEDED
Shop Skillets on Amazon →
Shop Tongs on Amazon →
Pan-Frying
Cooking food in a moderate amount of fat, coming partway up the sides, over medium-high heat.
- Heat oil about 1/4 to 1/2 inch deep in a skillet.
- Add breaded or seasoned food without crowding.
- Cook until golden on the bottom, then flip.
- Drain on paper towels or a rack.
TOOLS NEEDED
Shop Skillets on Amazon →
Shop Wire Rack on Amazon →
Shop Tongs on Amazon →
Deep-Frying
Fully submerging food in hot oil to cook it quickly and evenly, producing a crisp exterior.
- Heat oil to the target temperature (usually 325–375°F).
- Pat food dry, bread or batter if called for.
- Lower into the oil in small batches.
- Fry until golden, remove and drain.
TOOLS NEEDED
Shop Pots on Amazon →
Shop Thermometer on Amazon →
Shop Slotted Spoon on Amazon →
Roasting
Cooking food uncovered in the dry heat of an oven, developing browning on the exterior.
- Preheat the oven to the target temperature.
- Season the food, place on a rack or in a pan, uncovered.
- Roast, basting or turning if called for, until cooked through.
- Rest larger cuts 10–20 minutes before carving.
TOOLS NEEDED
Shop Roasting Pans on Amazon →
Shop Thermometer on Amazon →
Broiling
Cooking food quickly under very high, direct heat from above.
- Position a rack close to the broiler element and preheat.
- Place food on a broiler pan or baking sheet.
- Cook close to the heat, watching closely.
- Flip partway through for even browning.
TOOLS NEEDED
Shop Bloiler Pans on Amazon →
Shop Baking Sheets on Amazon →
Shop Tongs on Amazon →
Grilling
Cooking food directly over an open flame or hot coals, imparting char and smoky flavor.
- Preheat the grill to the appropriate heat zone.
- Oil the grates lightly.
- Cook, flipping once food releases easily with good grill marks.
- Move to indirect heat if browning too fast outside.
TOOLS NEEDED
Shop Grills on Amazon →
Shop Long Tongs on Amazon →
Shop Grill Brushes on Amazon →
Blanching
Briefly boiling food then plunging it into ice water to stop cooking, setting color and texture.
- Bring well-salted water to a rolling boil.
- Add vegetables, cook briefly (30 seconds to a few minutes).
- Remove and plunge into ice water immediately.
- Drain well once fully chilled.
TOOLS NEEDED
Shop Pots on Amazon →
Shop Slotted Spoon on Amazon →
Shop Bowls on Amazon →
Steaming
Cooking food using the vapor from boiling water, without submerging it directly.
- Bring a little water to a simmer under a steamer basket.
- Place food in the basket, above (not touching) the water.
- Cover tightly, steam until tender, checking water levels.
- Remove carefully — escaping steam is very hot.
TOOLS NEEDED
Shop Pots on Amazon →
Shop Steamer Baskets on Amazon →
Toasting
Browning food (nuts, spices, bread) using dry heat to deepen flavor.
- Heat a dry skillet, no oil, over medium heat.
- Add nuts, spices, or bread in a single layer.
- Stir or shake frequently until fragrant and lightly browned.
- Remove immediately — residual heat keeps browning.
TOOLS NEEDED
Shop Skillets on Amazon →
Shop Wooden Spoons on Amazon →
Moist Heat & Combination Methods
Braising
Cooking tougher cuts of meat slowly in a small amount of liquid, partially submerged, after searing.
- Sear the meat until browned on all sides, then remove.
- Sauté aromatics in the same pot.
- Return the meat, add liquid halfway up the sides.
- Cover and cook low and slow until fork-tender.
TOOLS NEEDED
Shop Pots on Amazon →
Shop Tongs on Amazon →
Stewing
Similar to braising, but with smaller pieces fully submerged in liquid, cooked slowly until tender.
- Cut meat and vegetables into bite-sized pieces.
- Sear the meat if desired, then remove.
- Add liquid to fully cover, plus aromatics.
- Simmer gently, adding vegetables at the right times.
TOOLS NEEDED
Shop Pots on Amazon →
Shop Ladles on Amazon →
Poaching
Gently cooking food in liquid kept just below a simmer, so the surface barely moves.
- Heat liquid until small bubbles just begin to form.
- Gently lower the food into the liquid.
- Maintain a bare simmer throughout cooking.
- Remove carefully with a slotted spoon.
TOOLS NEEDED
Shop Pots on Amazon →
Shop Slotted Spoon on Amazon →
Simmering
Cooking food in liquid kept at a gentle, steady bubble — hotter than poaching, below a full boil.
- Bring liquid to a boil, then reduce heat until bubbles rise gently.
- Add the food and maintain that gentle bubble.
- Skim off foam or impurities as they rise.
- Adjust heat to keep the simmer steady.
TOOLS NEEDED
Shop Pots on Amazon →
Shop Ladles on Amazon →
Boiling
Cooking food in liquid heated to a full, vigorous bubble.
- Bring liquid to a full rolling boil.
- Add the food, salting the water generously first.
- Maintain the boil for the required time.
- Drain promptly once done.
TOOLS NEEDED
Shop Pots on Amazon →
Shop Colanders on Amazon →
Sous Vide
Cooking food sealed in a bag in a precisely temperature-controlled water bath for even doneness.
- Season and vacuum-seal the food, removing air.
- Set an immersion circulator to the target temperature.
- Submerge and cook for the recommended time.
- Sear in a hot pan afterward for exterior color.
TOOLS NEEDED
Shop Bowls on Amazon →
Shop Vacuum Sealer on Amazon →
Deglazing
Adding liquid to a hot pan to loosen the flavorful browned bits stuck to the bottom.
- Remove seared food and pour off excess fat.
- Return the pan to heat and add a splash of liquid.
- Scrape the bottom with a wooden spoon to release the fond.
- Simmer briefly to reduce and concentrate flavor.
TOOLS NEEDED
Shop Skillets on Amazon →
Shop Wooden Spoons on Amazon →
Reducing
Simmering a liquid uncovered to evaporate water, concentrating flavor and thickening it.
- Bring the liquid to a simmer in a wide, shallow pan.
- Let it cook uncovered without stirring too much.
- Continue until it decreases and thickens as desired.
- Adjust seasoning near the end — flavors intensify as it reduces.
TOOLS NEEDED
Shop Skillets on Amazon →
Baking & Pastry Techniques
Creaming
Beating butter and sugar together until light and fluffy, incorporating air to help baked goods rise.
- Make sure the butter is softened, not melted.
- Beat butter and sugar together on medium speed.
- Continue until noticeably lighter in color and fluffy.
- Scrape down the bowl periodically.
TOOLS NEEDED
Shop Bowls on Amazon →
Shop Mixers on Amazon →
Folding
Gently combining a light, airy mixture into a heavier one without deflating it.
- Add a small portion of the light mixture to the heavier one first.
- Add the rest, then cut down through the center with a spatula.
- Sweep along the bottom and up the side, rotating the bowl.
- Repeat gently just until no streaks remain.
TOOLS NEEDED
Shop Bowls on Amazon →
Shop Rubber Spatulas on Amazon →
Kneading
Working bread dough by hand or machine to develop gluten, giving it structure and elasticity.
- Turn the dough onto a lightly floured surface.
- Push it away with the heel of your hand, then fold it back.
- Give the dough a quarter turn and repeat.
- Continue until smooth, elastic, and springs back when pressed.
TOOLS NEEDED
Shop Bench Scraper on Amazon →
Proofing
Allowing yeasted dough to rest and rise as the yeast produces gas, expanding the dough.
- Place dough in an oiled bowl, cover with a damp towel.
- Set in a warm, draft-free spot.
- Let rise until roughly doubled in size.
- Test with a finger — the indentation should slowly spring back partway.
TOOLS NEEDED
Shop Bowls on Amazon →
Blind Baking
Pre-baking a pie or tart crust before adding the filling, to prevent a soggy bottom.
- Line the raw crust with parchment paper.
- Fill with pie weights, dried beans, or rice.
- Bake until edges are set and lightly golden.
- Remove weights, bake briefly more if fully baked crust is needed.
TOOLS NEEDED
Shop Tart Pans on Amazon →
Shop Pie Weights on Amazon →
Laminating
Creating alternating layers of dough and butter through repeated folding and rolling.
- Encase a block of cold butter inside a sheet of dough.
- Roll into a long rectangle, keeping everything cold.
- Fold into thirds, then rotate 90 degrees.
- Repeat several times, chilling between folds.
TOOLS NEEDED
Shop Rolling Pins on Amazon →
Shop Bench Scraper on Amazon →
Docking
Poking small holes in raw pastry before baking, to let steam escape and prevent puffing.
- Roll out the dough to the desired thickness.
- Prick small, evenly spaced holes with a fork.
- Avoid areas meant to puff up decoratively.
- Bake as directed.
TOOLS NEEDED
Shop Forks on Amazon →
Shop Dough Docker on Amazon →
Tempering Chocolate
Carefully heating and cooling chocolate to stabilize it, giving a glossy finish and a satisfying snap.
- Melt two-thirds of the chopped chocolate over a double boiler.
- Add the rest, stir until it melts in and cools to the target temperature.
- Test on a spoon — it should look glossy and firm, not streaky.
- Rewarm slightly to keep it in the working range.
TOOLS NEEDED
Shop Double Boilers on Amazon →
Shop Thermometers on Amazon →
Tempering Eggs
Gradually raising the temperature of eggs with hot liquid, so they don't scramble when combined.
- Whisk the eggs in a bowl.
- Ladle a little hot liquid in while whisking constantly.
- Continue adding hot liquid gradually, whisking.
- Pour the tempered mixture back into the remaining hot liquid.
TOOLS NEEDED
Shop Bowls on Amazon →
Shop Wisks on Amazon →
Scoring
Cutting shallow slashes into risen bread dough before baking, controlling expansion and venting steam.
- Use a sharp blade just before baking.
- Make quick, confident slashes at a slight angle, about 1/4 inch deep.
- Use a single long slash, or several diagonal cuts.
- Bake immediately after scoring.
TOOLS NEEDED
Shop Bread Lames on Amazon →
Sauce & Emulsion Techniques
Emulsifying
Combining two liquids that don't naturally mix into a stable, uniform mixture.
- Start with the emulsifying agent (egg yolk, mustard) in a bowl.
- Add oil drop by drop at first, whisking constantly.
- Once it thickens, add remaining oil in a thin, steady stream.
- Keep whisking throughout to avoid breaking the emulsion.
TOOLS NEEDED
Shop Bowls on Amazon →
Making a Roux
Cooking equal parts fat and flour together as a thickening base for sauces and gravies.
- Melt the fat in a saucepan over medium heat.
- Whisk in an equal amount of flour by weight.
- Cook, whisking constantly, 1–2 minutes (longer for darker roux).
- Gradually whisk in liquid until smooth.
TOOLS NEEDED
Shop Sauce Pans on Amazon →
Shop Wisks on Amazon →
Beurre Blanc
A classic emulsified butter sauce made by whisking cold butter into a reduced wine-vinegar mixture.
- Simmer wine, vinegar, and shallot until reduced to a few tablespoons.
- Reduce heat to low.
- Whisk in cold butter a few pieces at a time.
- Keep heat gentle throughout; serve immediately.
TOOLS NEEDED
Shop Sauce Pans on Amazon →
Shop Wisks on Amazon →
Beurre Manié
A paste of equal parts softened butter and flour, whisked into simmering liquid to thicken quickly.
- Mash equal parts softened butter and flour into a smooth paste.
- Bring the liquid to a simmer.
- Whisk small pieces of paste in, a little at a time.
- Continue whisking until the sauce thickens as desired.
TOOLS NEEDED
Shop Bowls on Amazon →
Shop Forks on Amazon →
Straining
Pushing a sauce through a fine strainer to remove solids and achieve a perfectly smooth texture.
- Set a fine-mesh strainer over a clean bowl.
- Pour the sauce through.
- Press with a ladle to extract flavorful liquid from the solids.
- Discard the solids left behind.
TOOLS NEEDED
Shop Fine Mesh Strainer on Amazon →
Shop Bowls on Amazon →
Vinaigrette
Combining oil and vinegar (or another acid) into a balanced, temporarily emulsified dressing.
- Whisk the acid together with seasonings or mustard.
- Slowly drizzle in the oil while whisking continuously.
- Whisk until slightly thickened and uniform.
- Whisk again just before using, since it separates on standing.
TOOLS NEEDED
Shop Bowls on Amazon →
Egg Techniques
Boiling Eggs
Cooking whole eggs in their shells to soft, medium, or hard doneness.
- Bring water to a boil, gently lower in the eggs.
- Soft: ~6 min, medium: ~8–9 min, hard: ~10–12 min.
- Transfer immediately to an ice water bath.
- Peel once cool enough to handle.
TOOLS NEEDED
Shop Pots on Amazon →
Shop Slotted Spoon on Amazon →
Shop Bowls on Amazon →
Poaching Eggs
Cooking a shelled egg gently in barely simmering water so the white sets around the yolk.
- Bring water to a bare simmer with a splash of vinegar.
- Crack the egg into a small cup.
- Create a gentle whirlpool, slide the egg in.
- Poach 3–4 minutes, remove with a slotted spoon.
TOOLS NEEDED
Shop Pots on Amazon →
Shop Slotted Spoon on Amazon →
Shop Poached Egg Pans on Amazon →
Scrambling
Cooking beaten eggs gently, stirring continuously, for soft, creamy curds.
- Whisk the eggs well, season if desired.
- Melt butter in a pan over low to medium-low heat.
- Pour in eggs, stir slowly and continuously.
- Remove while still slightly underdone.
TOOLS NEEDED
Shop Non-Stick Pans on Amazon →
Shop Wisks on Amazon →
Shop Rubber Spatulas on Amazon →
Whipping Egg Whites
Beating egg whites to incorporate air, creating volume for meringues, soufflés, and light batters.
- Make sure the bowl and whisk are completely clean and fat-free.
- Beat on medium speed until foamy, then increase to high.
- Add sugar gradually once soft peaks form, if making meringue.
- Beat until the desired peak stage — soft or stiff.
TOOLS NEEDED
Shop Bowls on Amazon →
Shop Mixers on Amazon →
Rolled Omelet
Cooking thin layers of egg and rolling them together into a compact log (tamagoyaki-style).
- Heat a lightly oiled pan, pour a thin layer of beaten egg.
- Once mostly set, roll it to one side of the pan.
- Pour another thin layer, letting it flow under, and roll again.
- Continue building layers, then slice the finished roll.
TOOLS NEEDED
Shop Rectangular Tamagoyaki Pans on Amazon →
Shop Rubber Spatulas on Amazon →
Doneness & Testing
Checking Doneness by Touch
Estimating meat doneness by comparing its firmness to reference points on your hand.
- Touch thumb to index finger, press below the thumb — that softness is roughly rare.
- Middle finger for medium-rare, ring for medium, pinky for well-done.
- Press the meat with the same finger and compare resistance.
- Use a thermometer for larger cuts and more precision.
TOOLS NEEDED
Using a Meat Thermometer
Measuring internal temperature to confirm meat has reached a safe, desired doneness.
- Insert the probe into the thickest part, avoiding bone.
- Wait a few seconds for the reading to stabilize.
- Compare to the target temperature.
- Pull large roasts a bit early to account for carryover cooking.
TOOLS NEEDED
Shop Thermometers on Amazon →
Testing Bread Doneness
Confirming a loaf of bread is fully baked through.
- Remove the loaf from the oven and turn it out of the pan.
- Tap the bottom firmly with a knuckle.
- Listen for a hollow sound — done; dull thud — needs more time.
- Or check internal temperature, usually 190–210°F.
TOOLS NEEDED
Shop Thermometers on Amazon →
Testing Cake Doneness
Confirming a cake is baked through without being overdone.
- Insert a toothpick into the center of the cake.
- Pull it straight out.
- Clean or a few moist crumbs — it's done.
- Wet batter — bake more, test again in a few minutes.
TOOLS NEEDED
Al Dente Testing
Checking pasta or rice for a firm-to-the-bite texture, not fully soft.
- Start testing a minute or two before the suggested minimum time.
- Remove a piece and let it cool briefly.
- Bite in — some resistance in the center, not mushy or chalky.
- Drain immediately once it reaches this texture.
TOOLS NEEDED
Shop Forks on Amazon →
Shop Tongs on Amazon →
The Float Test
Using buoyancy as a sign that dumplings, gnocchi, or poached items are cooked through.
- Drop the item into gently boiling or simmering water.
- It sinks to the bottom initially.
- As the interior cooks, it rises and floats to the surface.
- Cook for the additional time specified once floating.
TOOLS NEEDED
Shop Slotted Spoon on Amazon →
Finishing & Presentation
Resting Meat
Letting cooked meat sit undisturbed before slicing, so juices redistribute.
- Remove the meat from heat once it reaches target temperature.
- Transfer to a board, tenting loosely with foil if desired.
- Rest — a few minutes for steak, up to 30 for a large roast.
- Slice against the grain once rested.
TOOLS NEEDED
Shop Cutting Boards on Amazon →
Slicing Against the Grain
Cutting meat perpendicular to its muscle fibers, shortening them for a more tender bite.
- Look closely to identify the direction the fibers run.
- Position your knife perpendicular to those lines.
- Slice through, cutting across the fibers.
- Most important for tougher cuts like flank or brisket.
TOOLS NEEDED
Shop Kitchen Knives on Amazon →
Shop Cutting Boards on Amazon →
Basting
Spooning or brushing liquid over food as it cooks, adding flavor and moisture to the surface.
- Prepare the basting liquid — pan drippings or a glaze.
- Periodically spoon or brush it over the food.
- Work quickly to minimize heat loss.
- Baste at intervals, often every 20–30 minutes for a roast.
TOOLS NEEDED
Shop Tasting Spoons on Amazon →
Shop Basting Brush on Amazon →
Garnishing
Adding a final decorative or flavor-boosting element to a finished dish just before serving.
- Choose a garnish that complements the dish's flavors.
- Prepare it just before serving so it stays fresh.
- Place it thoughtfully — a little goes a long way.
- Add delicate garnishes at the very last moment.
TOOLS NEEDED
Shop Paring Knives on Amazon →
Shop Kitchen Shears on Amazon →
Plating
Arranging finished food on a plate for visual appeal before serving.
- Choose a plate that complements the food, not overwhelms it.
- Position the main component slightly off-center.
- Add sauces with intention — a swoosh or pool, not haphazard.
- Wipe the plate rim clean before serving.
TOOLS NEEDED
Shop Plates on Amazon →
Shop Tasting Spoons on Amazon →
Seasoning to Taste
Adjusting salt, acid, and other seasonings throughout cooking, tasting as you go.
- Taste at multiple points during cooking, not just at the end.
- Add seasoning in small increments, tasting after each addition.
- Consider salt, acid, sweetness, and heat — not just salt.
- Let seasoning rest a minute after adding before tasting again.
TOOLS NEEDED